by Jackie Topa
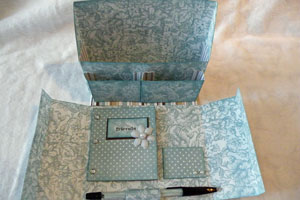
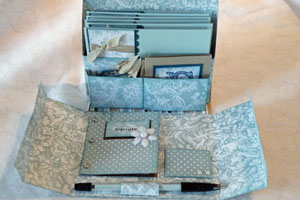
Make a beautiful gift box to hold stationery, notecards, a pen and postage.
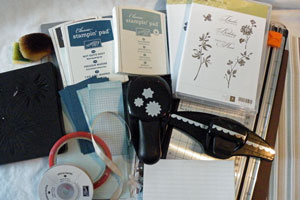
Supplies
- One 12 "x 12" piece of heavy patterned paper (box base)
- One 8 1/2" x 4 1/4" piece of heavy patterned paper
- One 5 1/2" x 2" piece of heavy patterned paper
- One 4 1/2" x 2" piece of heavy patterned paper
- Six 3 1/2" x 6" pieces of lined paper
- One 6 1/2" x 3 3/4" piece of heavy patterned paper
- One 2" x 3" piece of heavy patterned paper
- One 2" x 1 1/2" piece of heavy patterned paper or cardstock
- One 10 1/8" x 6 1/8" piece of cardstock (lid)
- Two 6" x 1 3/4" pieces of heavy patterned paper
- Two 2" x 1 3/4" pieces of heavy patterned paper
- Hole punch
- Brads
- Pen
- Sticky Strip™ or other strong adhesive
- Scissors
- Scoring tool
Step-by-Step
-
Step 1
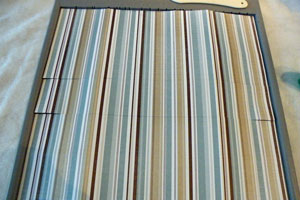
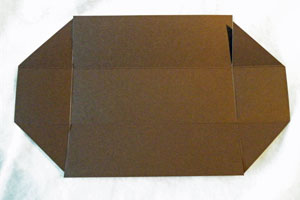
Score the 12" x 12" piece of heavy patterned paper at 5" and 7". Turn paper 90 degrees and score at 3" and 9" in the other direction.
-
Step 2
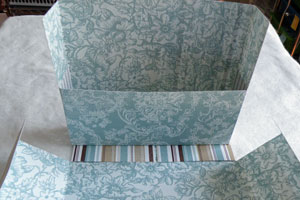
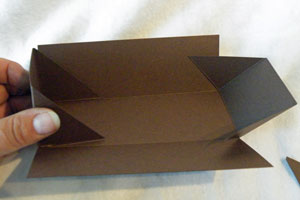
Cut sides to score lines. Fold these cut pieces into the center and glue down for extra support.
This will make the bottom of your card box.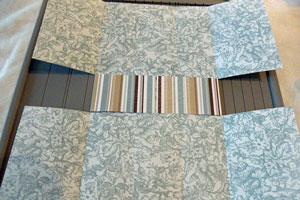
-
Step 3
Cut 1 3/4" off each side of the top panels only. Score the bottom two panels at 1" and 11".

-
Step 4
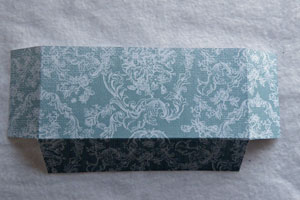
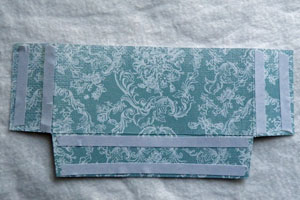
Score both short sides and one of the long sides of the 8 1/2" x 4 1/4" piece of heavy patterned paper at 1 1/4".
-
Step 5
Trim the corners and apply Sticky Strip™ to scored sections.
-
Step 6
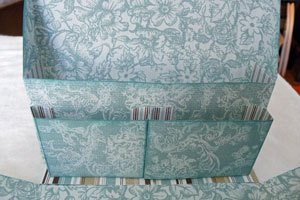
Fold up the top of the card box and attach this piece to the box to form a holder for the cards.
-
Step 7 (Optional)
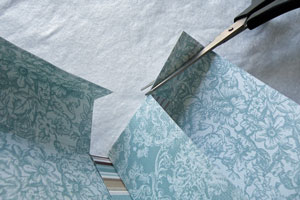
Use a pair of scissors to angle the paper from the top corner of the card box to the top corner of the card pocket.
-
Step 8
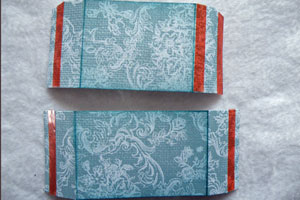
Score the 5 1/2" x 2"and the 4 1/2" x 2" pieces of cardstock at 1/2" and 1" from each end. Apply Sticky Strip™ along the score lines of the outer sections and to one of the inner sections as shown.
-
Step 9
Attach the pockets to the front of the card holder.
-
Step 10
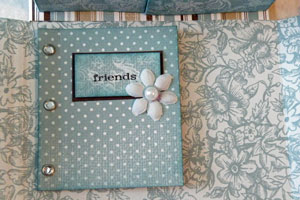
To make the address book, cut some lined paper to 3 1/2" x 6". Six pieces were used here, but the book can be any thickness.
Score the 6 1/2" x 3 3/4" piece of heavy patterned paper at 3 1/4" and 3 3/4" . Fold in half, insert the lined paper, punch three holes and insert brads.
-
Step 11
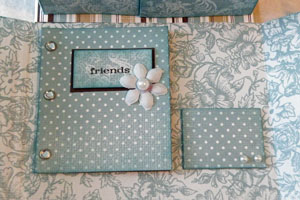
Embellish the address book and glue it to the bottom half of the card box, leaving enough room for the pen and stamp envelope.
-
Step 12
Score the 2" x 3" piece of heavy patterned paper at 1/2" on both short sides and one long side. Trim corners and fold scored pieces under.
-
Step 13
Embellish the stamp envelope as desired and glue it down beside the address book.
-
Step 14
Wrap the 2" x 1 1/2" piece of cardstock or patterned paper loosely around pen making a loop. Center the pen and then attach the loop to the stationery box.
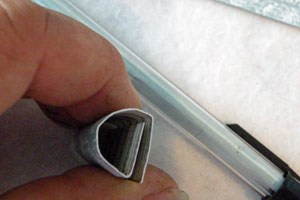
-
Step 15
Decorate the pen to match the stationery box by inserting a piece of patterned paper into the barrel of an RSVP® pen or adhere a piece to the outside of the pen.
-
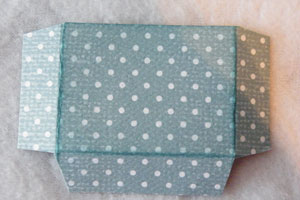
Step 16
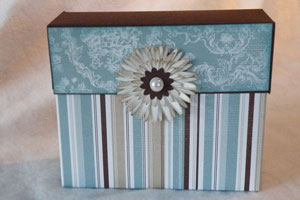
Score the 10 1/8" x 6 1/8" piece of cardstock at 2” on all sides. Cut the vertical score line up to the horizontal score line and trim the corners.
-
Step 17
Fold the ends up to form the lid and glue in place or use Sticky Strip™.
-
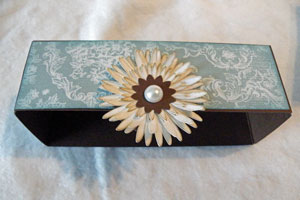
Step 18
Glue the two 6" x 1 3/4" and 2" x 1 3/4" pieces of heavy patterned paper to the lid and make an embellishment for the center.
-
Step 19
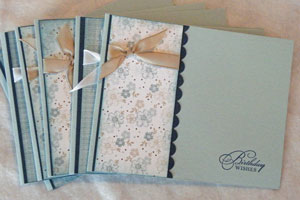
Make some cards to fill up the card box.
-
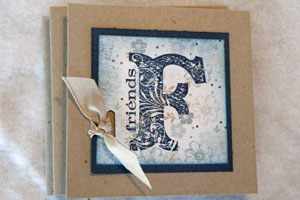
Step 20
Make some 3” x 3” note cards.
-
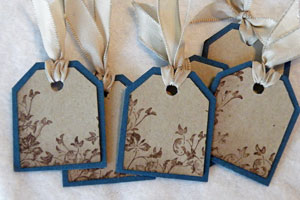
Step 21
Make some tags.
-
Step 22
The finished stationery box.
1 comment:
The project is great, and the tutorial directions are so clear and complete!
Th♥nks for sharing!
sending greetings from Germany
Regina*
Post a Comment